
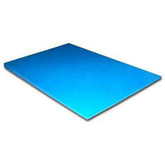

Concrete Drainboard Mold Giant
Quantité:
Fast Ship: Usually takes 1-2 business days to ship out.
Ships from Utah (Click for average Ground delivery map )
)
 Ships via FedEx/UPS only
Ships from Utah (Click for average Ground delivery map
)
Concrete Drainboard Mold Giant
- Drainboard Measurements:
- 29 3/4" Long
- 19 3/4" Wide
- Slopes from 1/4" thick to 1" thick.
- *Occasional imperfections may be present on Rubber Molds, and can be removed or altered using a sharp utility knife, or a very abrasive sand paper or resin-bound grinding discs.
Concrete Drainboard Mold Giant Detail:
- Rubber Drain Board insert for use with concrete countertop fabrication.
- The Giant Drainboard mold is a huge slab of sloped polyurethane material. Designed to allow you to customize your drainboard by cutting it to any shape or size you need.
- This slab is sloped, so water will drain towards the sink.
- In minutes you can now add a very professional, and 100% customized drainboard to your countertop form.
- Clean, nice edges. Fast and simple to use. Add a professional drainboard to your countertop form in minutes.
- Seamless integral drainboard, countertop, and/or sink.
- Drainboard slopes toward sink.
- If the drainboard needs to be shaped (to meet flush with a specific sink), simply cut the rubber mold with a sharp razor knife, or fine tooth jigsaw blade.
- Made of extremely durable polyurethane that can flex and stay strong.
- Can be used in pre-cast or poured in place concrete work.
- Fast and easy to place in a mold, and quick to clean after use.
- Good for hundreds of uses- Actually gets better with each use as they 'season'.
Concrete Drainboard Mold Giant Setup:
- Place Drainboard Mold in your form and silicone in place.
- For most applications (Precast), run a silicone a bead across the bottom edge of the Drainboard Mold to create a water-tight seal.
- If using for poured in place concrete countertops, press the drainboard down into the concrete surface, lightly tapping until flush with the surface, and then place a board or 2x4's across the top of the concrete and Drainboard Mold to hold it in place while the concrete sets up.
- Use of a Rubber Safe form release is recommended, and will create a smoother finish on the concrete, less air pockets, and make cleaning the rubber mold easier when finished.
- Vibrate concrete well (either vibrating the concrete, or rapidly tapping the edges of the forms with a hammer or palm sander), to remove as many air pocket voids as possible.
Drainboard Mold Removal:
- After the concrete is sufficiently set up (typically 2-3 days for precast), flip the concrete piece over and remove the Drainboard Mold. In many cases, the mold will stay siliconed to the form when separated from the concrete.
- Concrete may have small 'bumps' which can be sanded off with a 200 grit sandpaper. These bumps tend to disappear the more the Rubber Drainboard Mold is used, as it becomes seasoned.
- Fill any air pocket voids with a Concrete Slurry Mix.
Rubber Mold Care:
- Clean with a stiff brush and water after each use. Any silicone left on the forms should be peeled or scraped off (the sooner the easier to remove). Any hardened concrete and difficult to remove silicone can usually be removed using a wire brush.
- Muriatic Acid can be used to clean of cement residue from the rubber mold in a 20:1 ratio (20 parts water to 1 part muriatic acid). Rub the Drainboard Mold with a stiff nylon brush and the muriatic acid water. Rinse the mold thoroughly with clean water.
- Store rubber molds out of direct sunlight, laid out flat.