
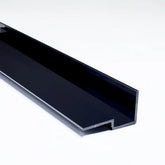
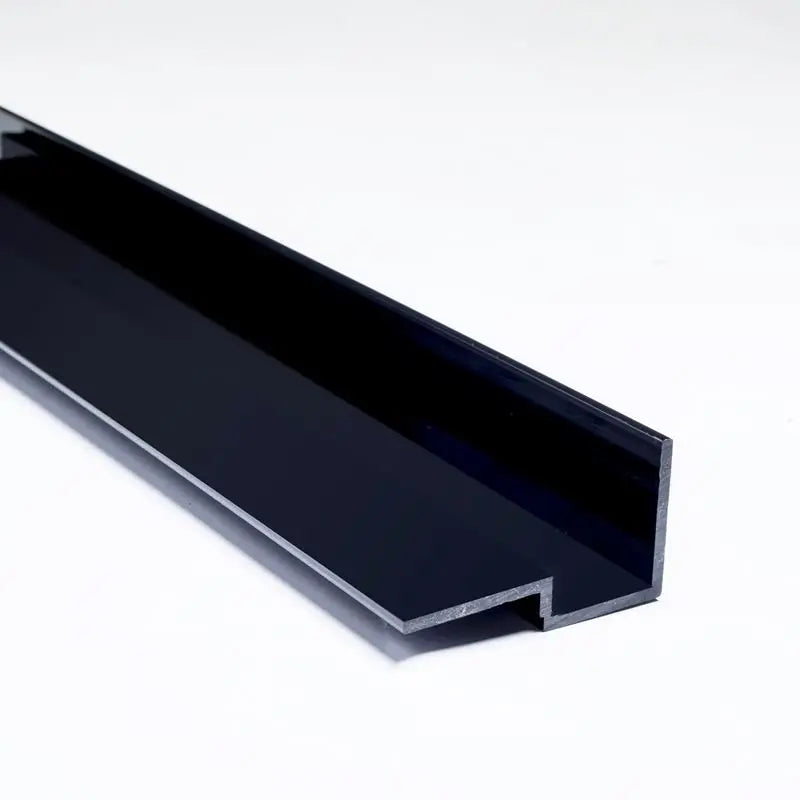
Concrete Countertop Cast In Place Forms- EuroForm Thin Edge
Package Size:Half-Box - 30 Ln. Ft. (90" Lengths)
Quantity:
Fast Ship: Usually takes 1-2 business days to ship out.
Ships from Pennsylvania (Click for average Ground delivery map )
)
 Ships via FedEx/UPS only
Ships from Pennsylvania (Click for average Ground delivery map
)
Concrete Countertop Cast In Place Forms- EuroForm Thin Edge
- Cast-in-Place Concrete Countertop Forms, Z-Counterforms.
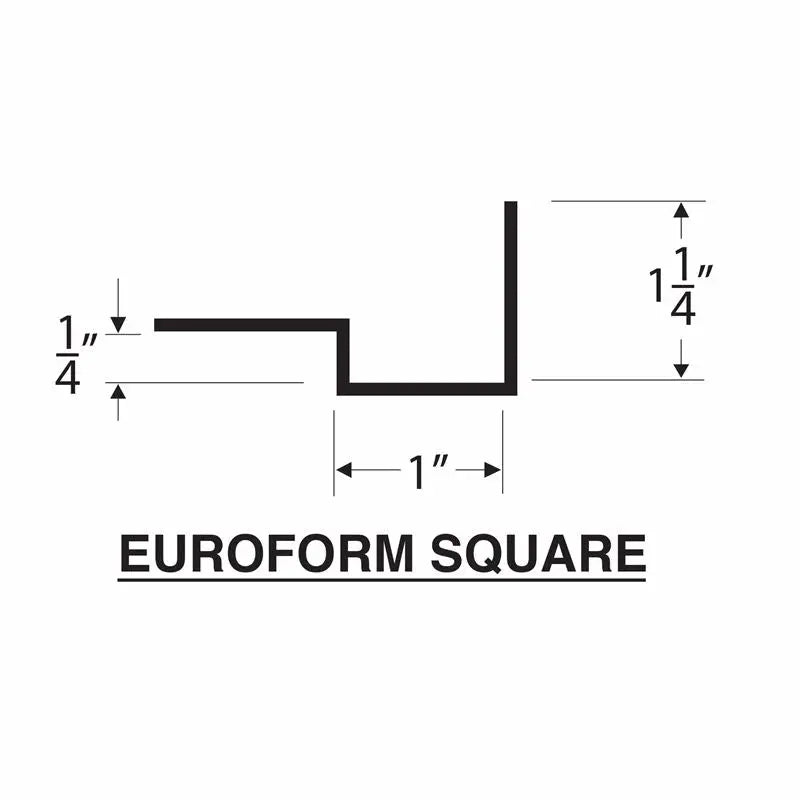
- Profile Design: EuroForm Square Edge. Click for all Cast-in-Place form profiles.
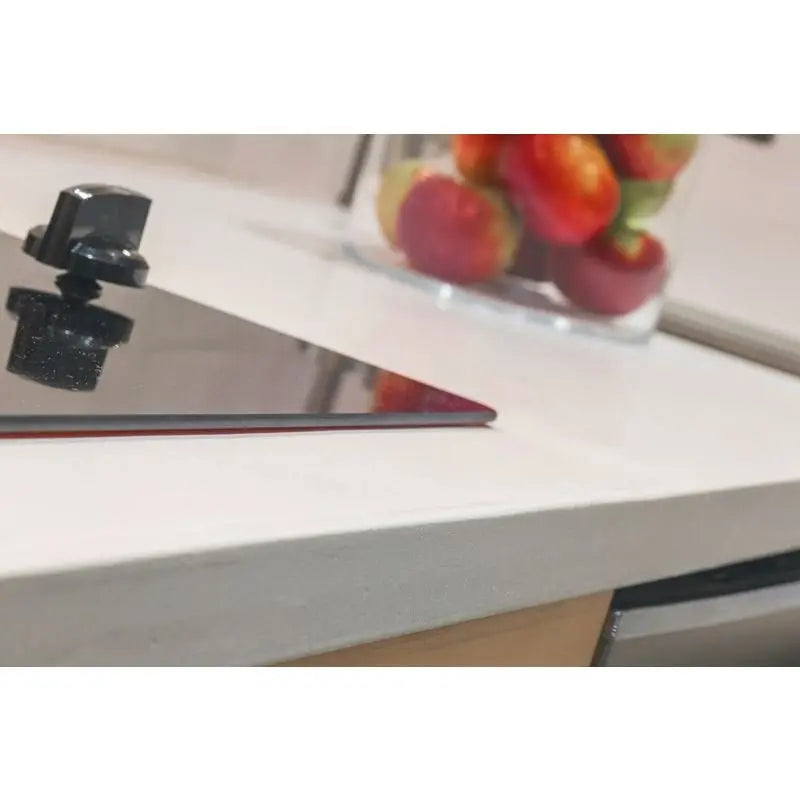
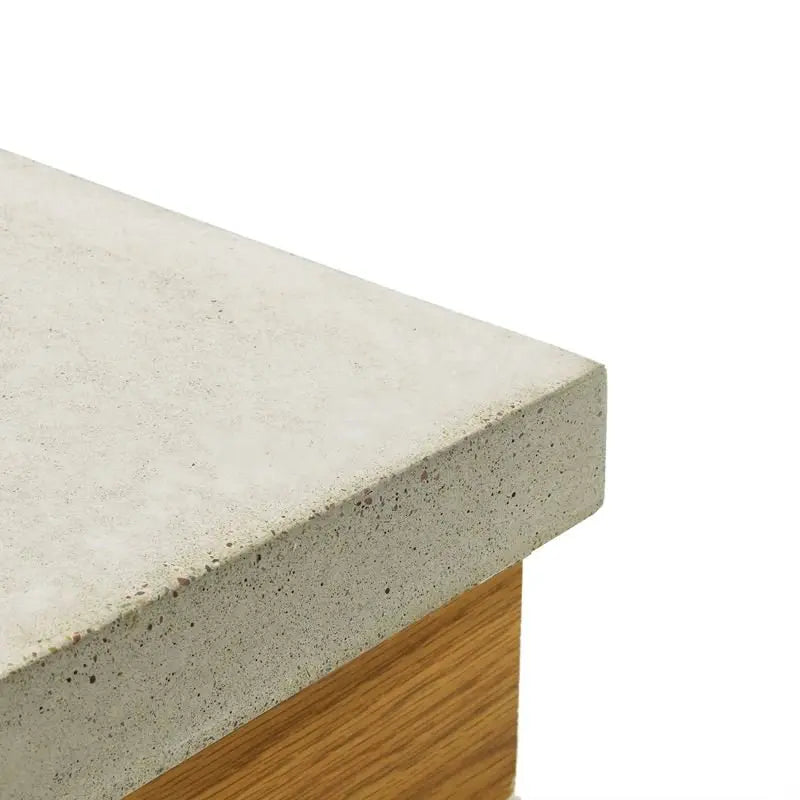
- Creates a thin, 1-1/4" height front edge to the in-place concrete countertop.
- EuroForm has a 1-1/4" tall front edge. You are only pouring 7/8" of concrete. To pour concrete this thin, a special mix must be used. We highly recommend the use of our White Countertop Mix. It is specially designed to be cast this thin without strength or cracking issues.
- Available in Half-Box and Full-Box sizes.
- Half-Box includes 4x 90" Countertop Forms (30 lineal feet), and 4x 90" Back-Wall pieces (30 lineal feet).
- Full-Box includes 8x 90" Countertop Forms (60 lineal feet), and 8x 90" Back-Wall pieces (60 lineal feet).
- Easy to set up and use, for both professional and DIY.
- Ships via UPS only due to box size.
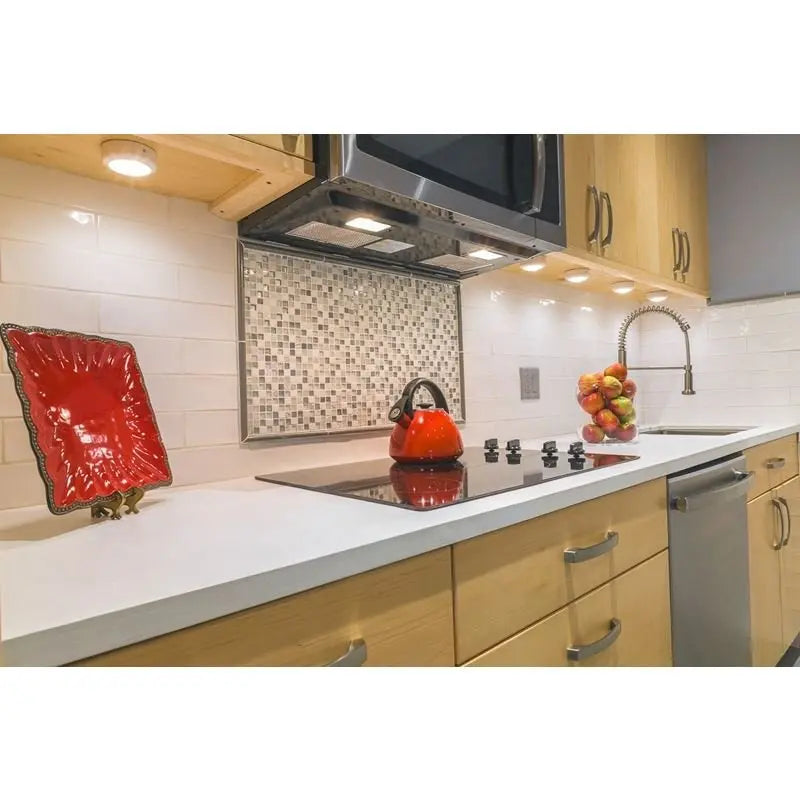
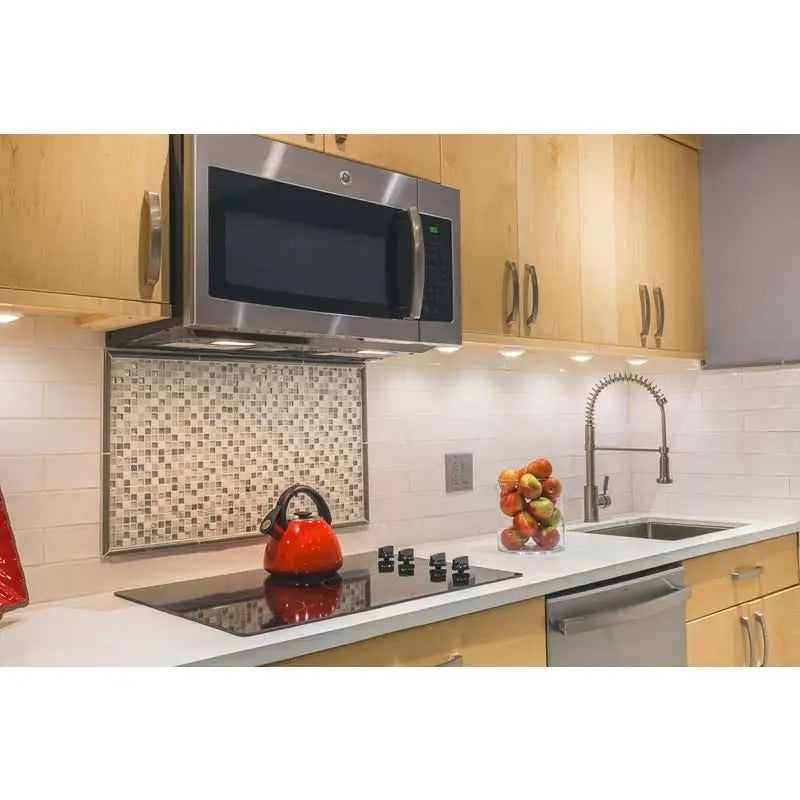
Application Concrete Countertop Cast In Place Forms- EuroForm Thin Edge
- These Countertop Forms are designed to be attached to the cement board, which is screwed onto the top of the cabinets. The Countertop Forms are simply snapped off when the concrete is cured, leaving behind the decorative edge countertop surface.
- Please watch the videos in the image gallery for a quick demonstration how to use the Forms:
- Step 1: Attach cement board (Thinner EuroForm edge should use 1/4" thickness cement board, from your local hardware store) to the top of the cabinetry.
- Step 2: Cut the Countertop Forms with a miter saw, and screw in place onto cement board. Use plenty of screws to ensure the Forms stay in place and can't move when you snap off the form later (once the concrete is cured). Tape the outside of each joint with duct tape to ensure a tight, waterproof joint.
- Step 3: Place Back-Wall pieces across the back of the countertop area (Back-Wall pieces (8' long each) are included with each box of Countertop Forms. Back-Wall pieces have an 'L' shape to them, and can be screwed down to the cement board. They create a back edge to allow a screed to be run across the concrete, creating a smooth, flat countertop.
- Step 4: OPTIONAL- Create a hole for a sink, if needed.
- For an under-mount style sink, cut a hole in the cement board to fit the sink into, use the Cast-in-Place Sink Form (sold here) to attach to the sink itself, and place the sink into the cement board.
- For a drop-in style sinks or cook top stove drop-ins, the Back-Wall Pieces can be used to create a square or rectangular area. Styrofoam can also be used to create a knockout of any size or shape needed.
- Step 5: Silicone all areas of the form where water could leak out. This includes along the inside edge where the Forms are screwed to the cement board, along the back wall, across joints in the cement board, and around any sink knockouts.
- Step 6: Fill form with concrete. Pack the concrete into the Edge Form to remove any large air pockets, and vibrate the Edge Form with a palm sander or other vibration source. Poor vibration will result in a large number of voids in the concrete edge- ranging from small pinholes to larger pea sized holes. Sometimes this look is sought after, but if it's not, make sure to vibrate well.
- A long enough trowel is the key to a flat countertop. We recommend a 16" Magnesium Float (sold here) and a 36" Darby Float (sold here). A 16" Steel Trowel (sold here) is good to finish the concrete once it sets up for a smooth finish.
- Step 7: Allow concrete to cure (usually a few days). Remove and tape from the joints. Sand off any excess concrete from the top corners (where concrete meets the Countertop Forms) with a Diamond Sanding Foam Pad (sold here) or a Flexible Diamond Sanding Strip (sold here).
- Step 8: Remove Countertop Forms by simply pulling them away from the concrete, which will snap the Edge Form off, leaving the concrete countertop.
- Step 9: OPTIONAL- Polish concrete using diamond polishing pads. Cast-in-Place concrete will usually have some unevenness to it, which can be lightly polished off using Dry Diamond Polishing Pads, usually grits 50,100,200 is sufficient. If polishing down to expose more aggregate, consider using Wet Diamond Polishing Pads.
- Step 10: Any surface or edge pinholes and voids in the concrete can be filled with a Cement Slurry (sold here).
- Steps 11,12,13... Concrete can be stained/colored (stains/colors sold here) if desired. Concrete Countertop Sealers can be applied once the concrete is dry (sealers sold here).
FAQ:
Q. What are the Z-Counterforms made of?
A. Z-Counterforms are made of a proprietary mix of P.V.C.Q. Will the Z-Counterforms warp from the concrete?
A. No, forms are approximately 3mm thick to ensure a stable form even after the concrete is poured.Q. How do I make corners?
A. Corners are simply mitered with an ordinary miter box. Any angle can be easily achieved.Q. Does concrete adhere to the Z-Counterform?
A. No, concrete will not adhere to the inside of the Z-Counterform. The forms are polished to a gloss finish so the concrete edge will mirror the form when it is snapped off.Q. Are Z-Counterforms re-useable?
A. No, because the tab under the concrete top stays in place when you snap off the Z-Counterform.