


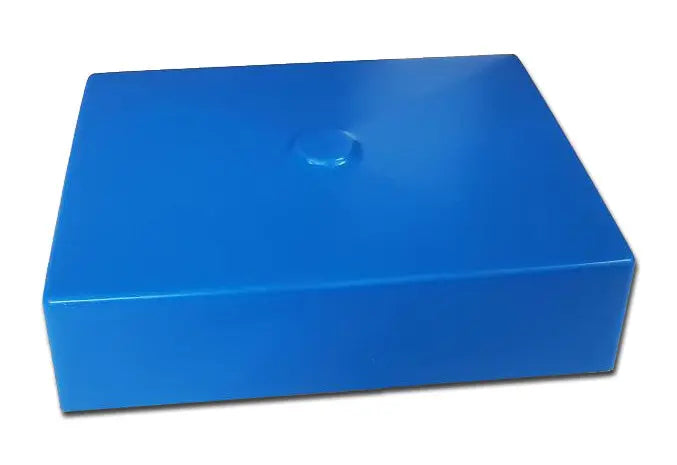
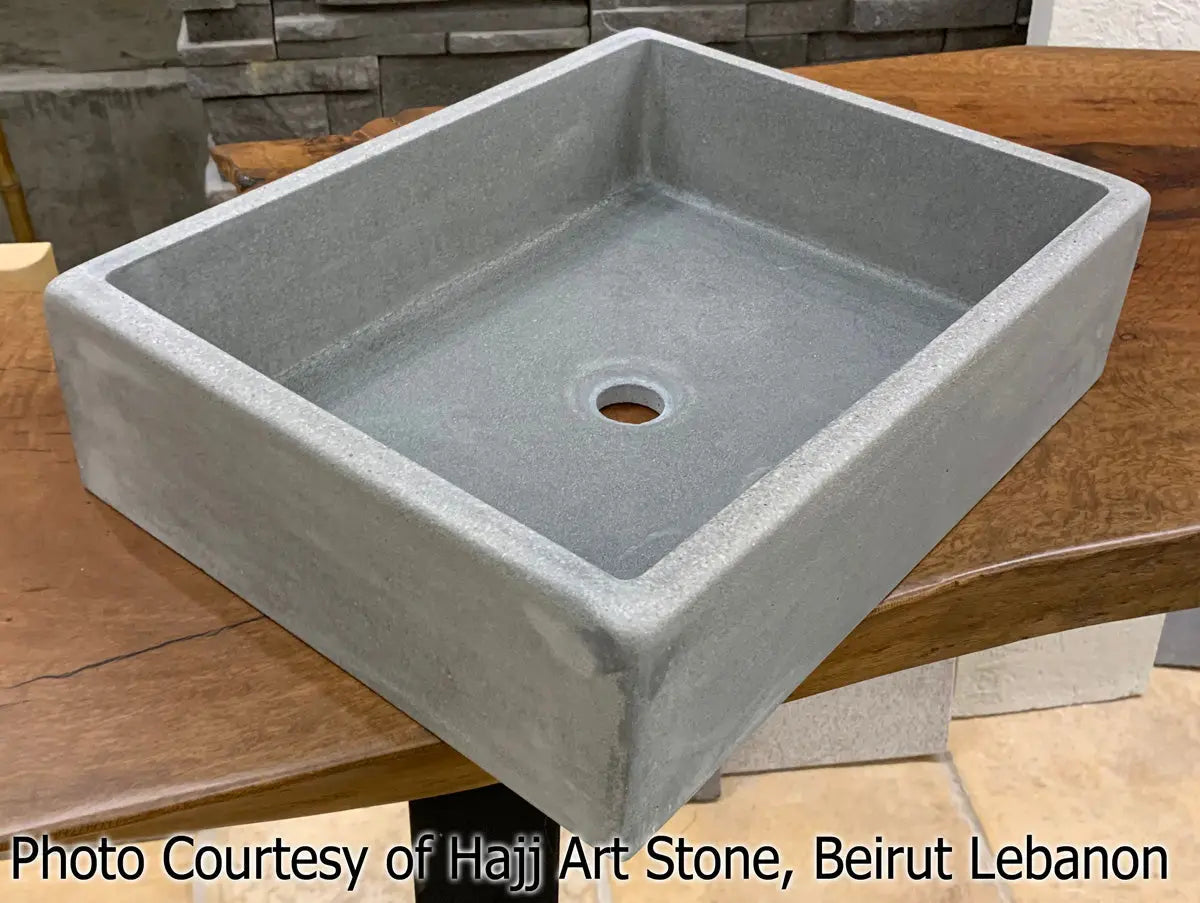
Concrete Sink Mold SDP-21-D Rectangle Shallow (16.5"x12.5"x4")
Quantity:
Fast Ship: Usually takes 1-2 business days to ship out.
Ships from Utah (Click for average Ground delivery map )
)
Ships from Utah (Click for average Ground delivery map
)
Concrete Sink Mold SDP-21-D Rectangle Shallow (16.5"x12.5"x4")
-
- Our SDP (Super Durable Polyurethane) Line of Sink Molds are made from the highest grade Polyurethane Rubber. Won't chip and crack like fiberglass, and much easier to get out of concrete after casting. A lifetime of reusability.
- The 17" Rectangle is a bathroom sized rectangle sink with tight radius corners, and four distinct angle marks in the bottom of the sink, sloping to the central drain.
- Small style drain for bathroom lavatory size drains. Each rubber Sink Mold comes with a reusable Rubber Drain Knockouts (1.5" size) to be used for the drain hole (simply silicone the rubber plug onto the drain area of the mold).
- IMPORTANT NOTE: Regarding the metal drain hardware that goes into a finished concrete sink- There are so many options now for drain parts, some will be too large to fit this sink. For the best fit, use a drain that has a max diameter on the metal flange (top part that you see in the finished sink) of 2.25". The 'body' of the drain that fits down the hole should be under 1.5" (ideally around 1.4" to fit easily). We routinely purchase and use these Drain Strainers from Amazon (sold here). Or these Pop-Up Drains (sold here)
- Create a seamless integral concrete sink and counter top, or form around to create a vessel sink.
- All our molds have Lifetime Guarantee against defect. This Guarantee does not cover misuse of the Molds (Dropping the Mold, Prying the Mold out using a screwdriver, Driving onto it with a truck tire... etc.).
- Expressions LTD will not be held liable for any damage, misuse, or collateral damages resulting from use of any of our products. If there is a flaw or defect with a product, we will fix or replace the product.
Specifications- Concrete Sink Mold SDP-21-D Rectangle Shallow (16.5"x12.5"x4"):
- Length: 16.5" (Across)
- Width: 12.5" (Front-To-Back)
- Depth: 4" (At Drain)
- Sides have at least a 5° slope to ensure Mold removal from concrete.
- This mold is very shallow 4" Deep version of our standard SDP-21 Mold. We also have the SDP-21-C Mold that is a 5" depth. (We can modify most of our molds to different depths upon request)
Mold Use:
- Watch videos of Mold Setup, Casting, and De-Molding/Removal on our YouTube Video Page.
- A basic Sink Mold Instruction sheet is available here.
- Rubber molds may have a little oil on them when you receive them, from our manufacturing process. Clean off any oil with a mild cleaner and paper towels. Once clean, apply Mold Release Wax. Lots of coats of wax will help get mold out easier! You may want to lightly sand the mold by hand with 200 or 400 grit sandpaper, to give it a little more surface to 'hold' the wax: To wax the mold, apply 5 coats of Mold Release Wax to the mold, lightly buffing between coats once it hazes.
- Apply small amounts of silicone to the Mold's bottom, and set in place in your form. Allow silicone to dry.
- Screws can be used to secure the Mold if necessary. Using screws of the appropriate length, screw through the bottom of the form, up into the bottom of the Sink Mold.
- Run a smooth silicone bead around perimeter of the Sink Mold, where it meets the form base (using a tool such as our Caulking Ball Tool makes this process very clean and easy).
- Apply a thin coat of Rubber Safe Form Release to the Mold just prior to casting the concrete piece.
Concrete Casting:
- Various methods can be used to cast the concrete piece. View our Concrete Recipe section for tips on concrete mixes.
- GFRC: Cement and fiberglass is sprayed on and hand packed into the form and around the Mold.
- Wetcast: Oatmeal consistency concrete is placed in form and around the Mold and vibrated. A simple box should be built around the Sink Mold, to contain the concrete during this process.
- Hand Packed: A drier concrete mix is hand packed into the form and around the Mold. A second step after de-molding will fill the voids with cement slurry, usually of a different coloring.
- Any voids in the finished concrete can be filled using a Cement Slurry.
- Mix your own slurry by mixing Portland cement, Cenospheres, and water (or water/Polymer mix).
Mold Removal:
- If the steps above were followed for the Mold Setup, then most Molds will usually pull out of the concrete with little effort.
- If the mold is difficult to remove, try:
- Compressed air shot around the Mold rim will break the suction holding the Mold in the concrete.
- Most Molds can be pushed out of the concrete by removing the drain piece, and pushing the Mold out through the drain slot.
- Rubber type molds are usually stuck in concrete like an air-suction. Sliding a very thin plastic putty knife between concrete and mold is usually all it takes to release the air suction on a very stuck mold.
Clean-up and Care of Concrete Sink Mold SDP-21-D Rectangle Shallow (16.5"x12.5"x4"):
- Clean Mold with a sponge after each use. Any dried cement residue can be removed with a scotch-brite pad (as outlined above in the Mold Setup section. A light muriatic acid wash (20:1, 20 parts water to 1 part muriatic acid) can also remove cement scale.
- Waxing and buffing the Mold after cleaning it use is recommended to protect the Mold until its next use.