
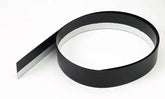

Concrete Countertop Cast In Place Forms- Sink Form
Quantity:
Fast Ship: Usually takes 1-2 business days to ship out.
Ships from Pennsylvania (Click for average Ground delivery map )
)
 Ships via FedEx/UPS only
Ships from Pennsylvania (Click for average Ground delivery map
)
Concrete Countertop Cast In Place Forms- Sink Form
-
8 ft. long x 3-1/4" tall self-adhering flexible sink form. Will conform to most undermount sinks
**Sink must have vertical walls. For tight radius corners, sink form can be heated with a blow dryer or heat gun to soften the plastic so it bends easier. If using a zero radius sink, sink form will have to be cut into 4 pieces (one for each side of the sink).**
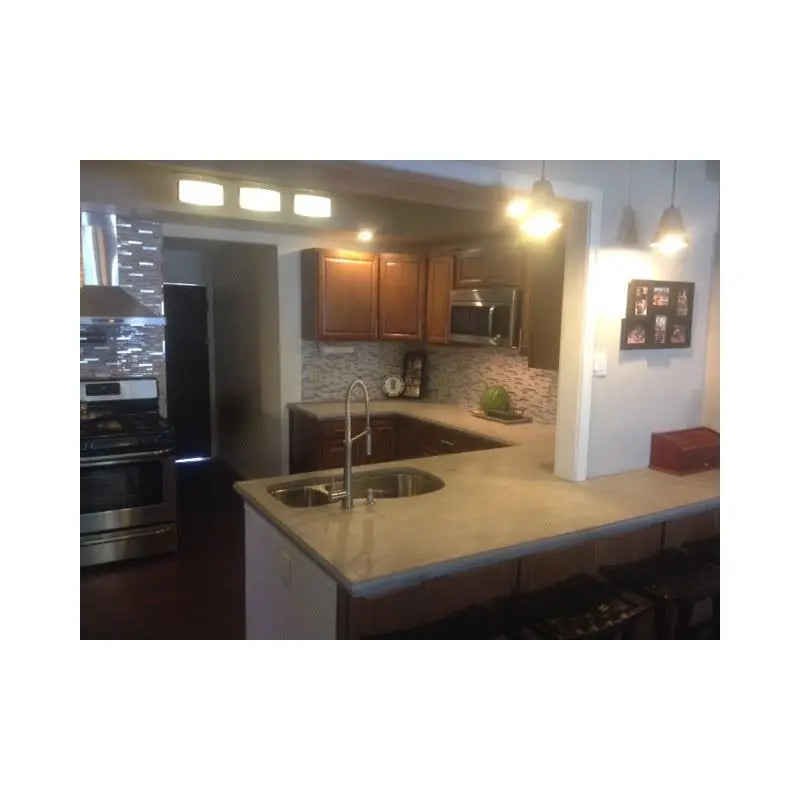
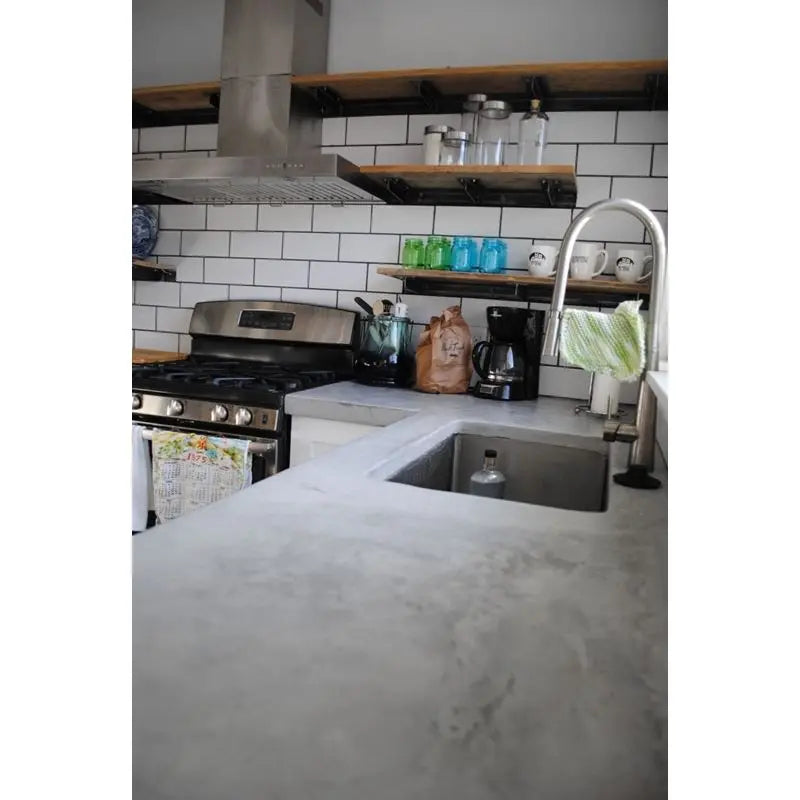
- Use with Cast-in-Place Countertop Forms (sold here).
- Fast and easy to make a form around an undermount sink when making a cast in place concrete countertop.
- The Sink Form may be re-usable, when using new Mounting Tape (sold here).
Application Concrete Countertop Cast In Place Forms- Sink Form
- Watch the video below to see the setup of the Sink Form.
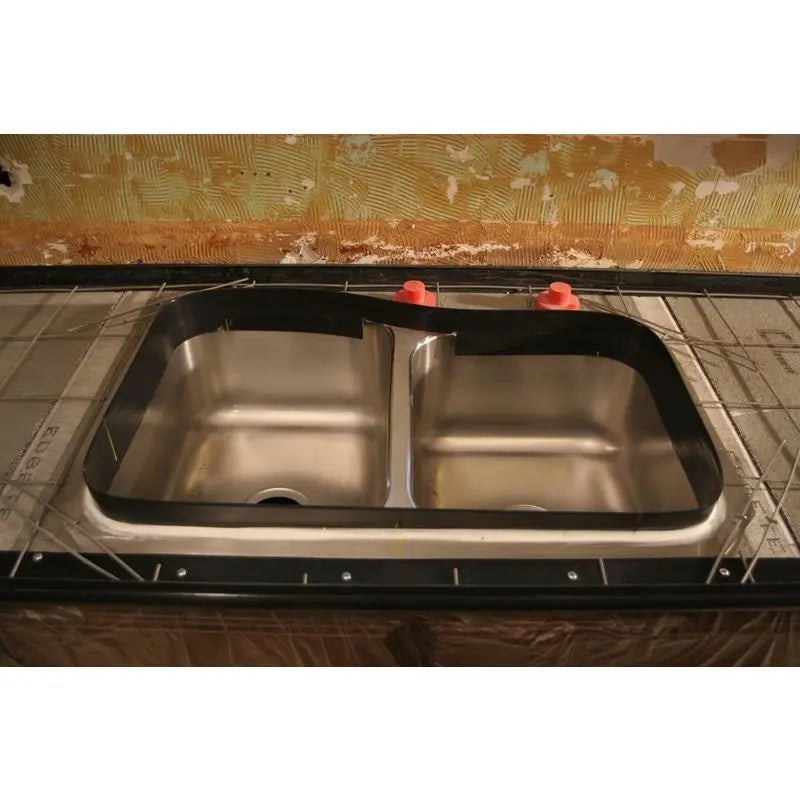
- Secure your undermount sink in place (in the cement board on top of the cabinets).
- Dry-fit the Sink Form piece to the sink, and mark where to cut it. Cut the Sink Form piece with a miter saw.
-
Your countertop forms should be set up before doing the sink, so you can place a level board across, over the sink area so you know how high the Sink Form piece needs to be to match the height of the countertop. Cutting a small piece of wood to the exact height of the top of the sink to the bottom of the level will make things easy (again, see video below to see demonstration).
- Peel off backing from self-adhesive tape on the Sink Form, as you work around the edge of the sink sticking the Form to the sink.
- Tape the seam with duct tape (tape should be on the inside of the sink- not where the concrete goes. To help hide the seam in the finished concrete, a little silicone can be used to fill the concrete-side of the seam, and smoothed with the flat of a razor blade.
- Use silicone caulk to fill the gap between the Sink Form and the undermount sink, and smooth for a nice bead using something like our Caulking Ball Tools (sold here).
- After concrete is poured, allow concrete to cure (usually a few days). Remove and tape from the seam. Sand off any excess concrete from the top corners (where concrete meets the Countertop Forms) with a Diamond Sanding Foam Pad (sold here) or a Flexible Diamond Sanding Strip (sold here). Slowly remove the Sink Form piece.